

Connect A Domain
How to Connect a Custom Domain to a SiteSwan Website
Any custom domain name can be pointed to a SiteSwan website. You can use a custom domain like "yourname.com" or "yourname.net" for your site. This process may vary slightly depending on the domain registrar associated with the domain, and it's best to contact the domain registrar itself for further assistance.
Here's how, using GoDaddy.com as our example:
STEP 1
Purchase the domain name from a registrar such as CheapNEasyDomains.com, for example. This can be done for about $10/year.
STEP 2
Log in to your account and go "My Products" then look for the section titled "Domains" and click the "Manage" button next to it.
Purchase the domain name from a registrar such as CheapNEasyDomains.com, for example. This can be done for about $10/year.
STEP 2
Log in to your account and go "My Products" then look for the section titled "Domains" and click the "Manage" button next to it.
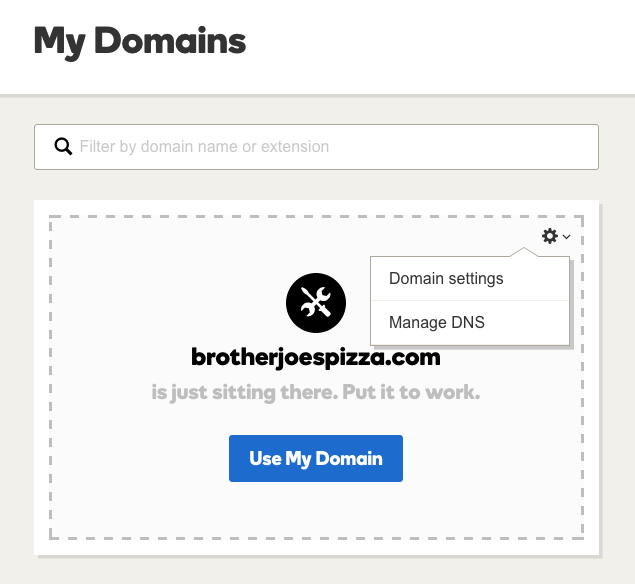
STEP 3
From the "My Domains" page, find the domain name you want to manage. Click the gear icon in the top right, and click "Manage DNS".
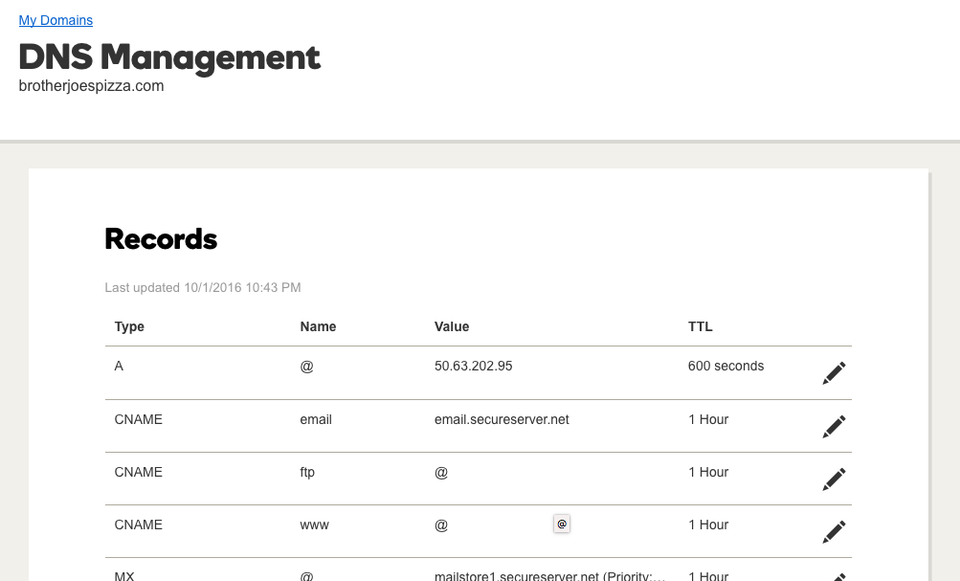
STEP 4
From the DNS Management page, click the "Edit Record" button (pencil icon) to change your CNAME Record on the line that reads "www" in the "Name" column.
From the DNS Management page, click the "Edit Record" button (pencil icon) to change your CNAME Record on the line that reads "www" in the "Name" column.
STEP 5
Change the "Points To" value to domain.multisiteadmin.com and click "Save."
(Copy and paste, or type domain.multisiteadmin.com - Do not use your actual domain name)
Change the "Points To" value to domain.multisiteadmin.com and click "Save."
(Copy and paste, or type domain.multisiteadmin.com - Do not use your actual domain name)

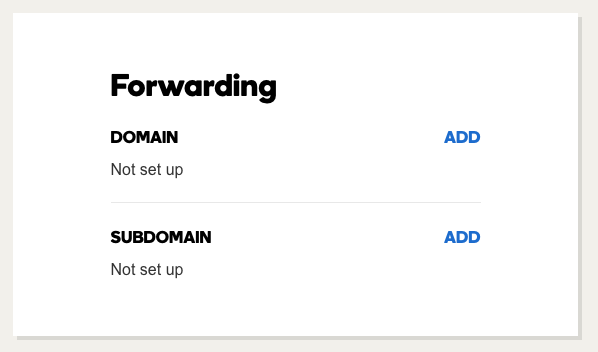
STEP 6
Scroll to the bottom of the DNS Management page, to the "Forwarding" section, and next to "Domain", click "Add"
Scroll to the bottom of the DNS Management page, to the "Forwarding" section, and next to "Domain", click "Add"
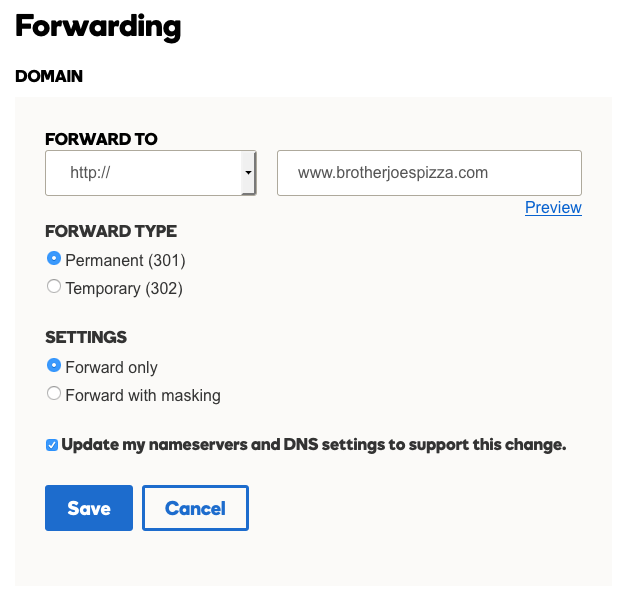
STEP 7
Type the domain you are using, but with "www." in front of the domain. This is a necessary step to ensure the site always loads with the www prefix. For the "Forward Type", choose "Permanent (301)". For the "Settings" choose "Forward Only" and be sure to check the box to "Update Nameservers and DNS settings to support this change". Then click "Save"
STEP 8
On your SiteSwan site, enter the domain name on your Settings tab and click the "Save All" button. It will then take up to 72 hours for the change to fully take place.
NOTE: You do not need to change your domain's nameservers, only the CNAME Record and Domain Forwarding. You also do not need to purchase any hosting services for the domain.